Flags
Flags provide the ability to toggle functionality of your code on and off remotely. They can be set up to target specific groups of users, also known as audiences.
Flag Dashboard
The main view of the Flags section is a list of all of your flags. You can see the name, key, enabled status, when it was created, and when it was last updated. You can click on the toggle switches in the enabled column to flip them on and off right from the dashboard.
There is a Search bar where you can filter by both name and key. There is also a checkbox for you to view only Enabled flags.

Creating a Flag
To create an flag, click on the Create Flag button on the top right of the Flag Dashboard. Clicking on it will reveal a modal. Here are the fields:
- A title/name. This is simply a display name meant to help you easily identify your created flags.
- A key. This can be anything you want, though it should be somewhat similar to your title/name. For example, if your flag is "Beta Header", your key can be "beta_header". This key will be used in your application, so it's recommended to make the key easy to identify.
- Note that the key must be made up of alphanumeric/underscore characters only. It also cannot be changed after creation.
- Targeted audiences. These are the audiences that you want your flag to target. You can select none, one, or multiple. You can edit this later.
- If you select multiple audiences, note that the user only needs to qualify for at least ONE of the audiences in order to evaluate to true for this flag.
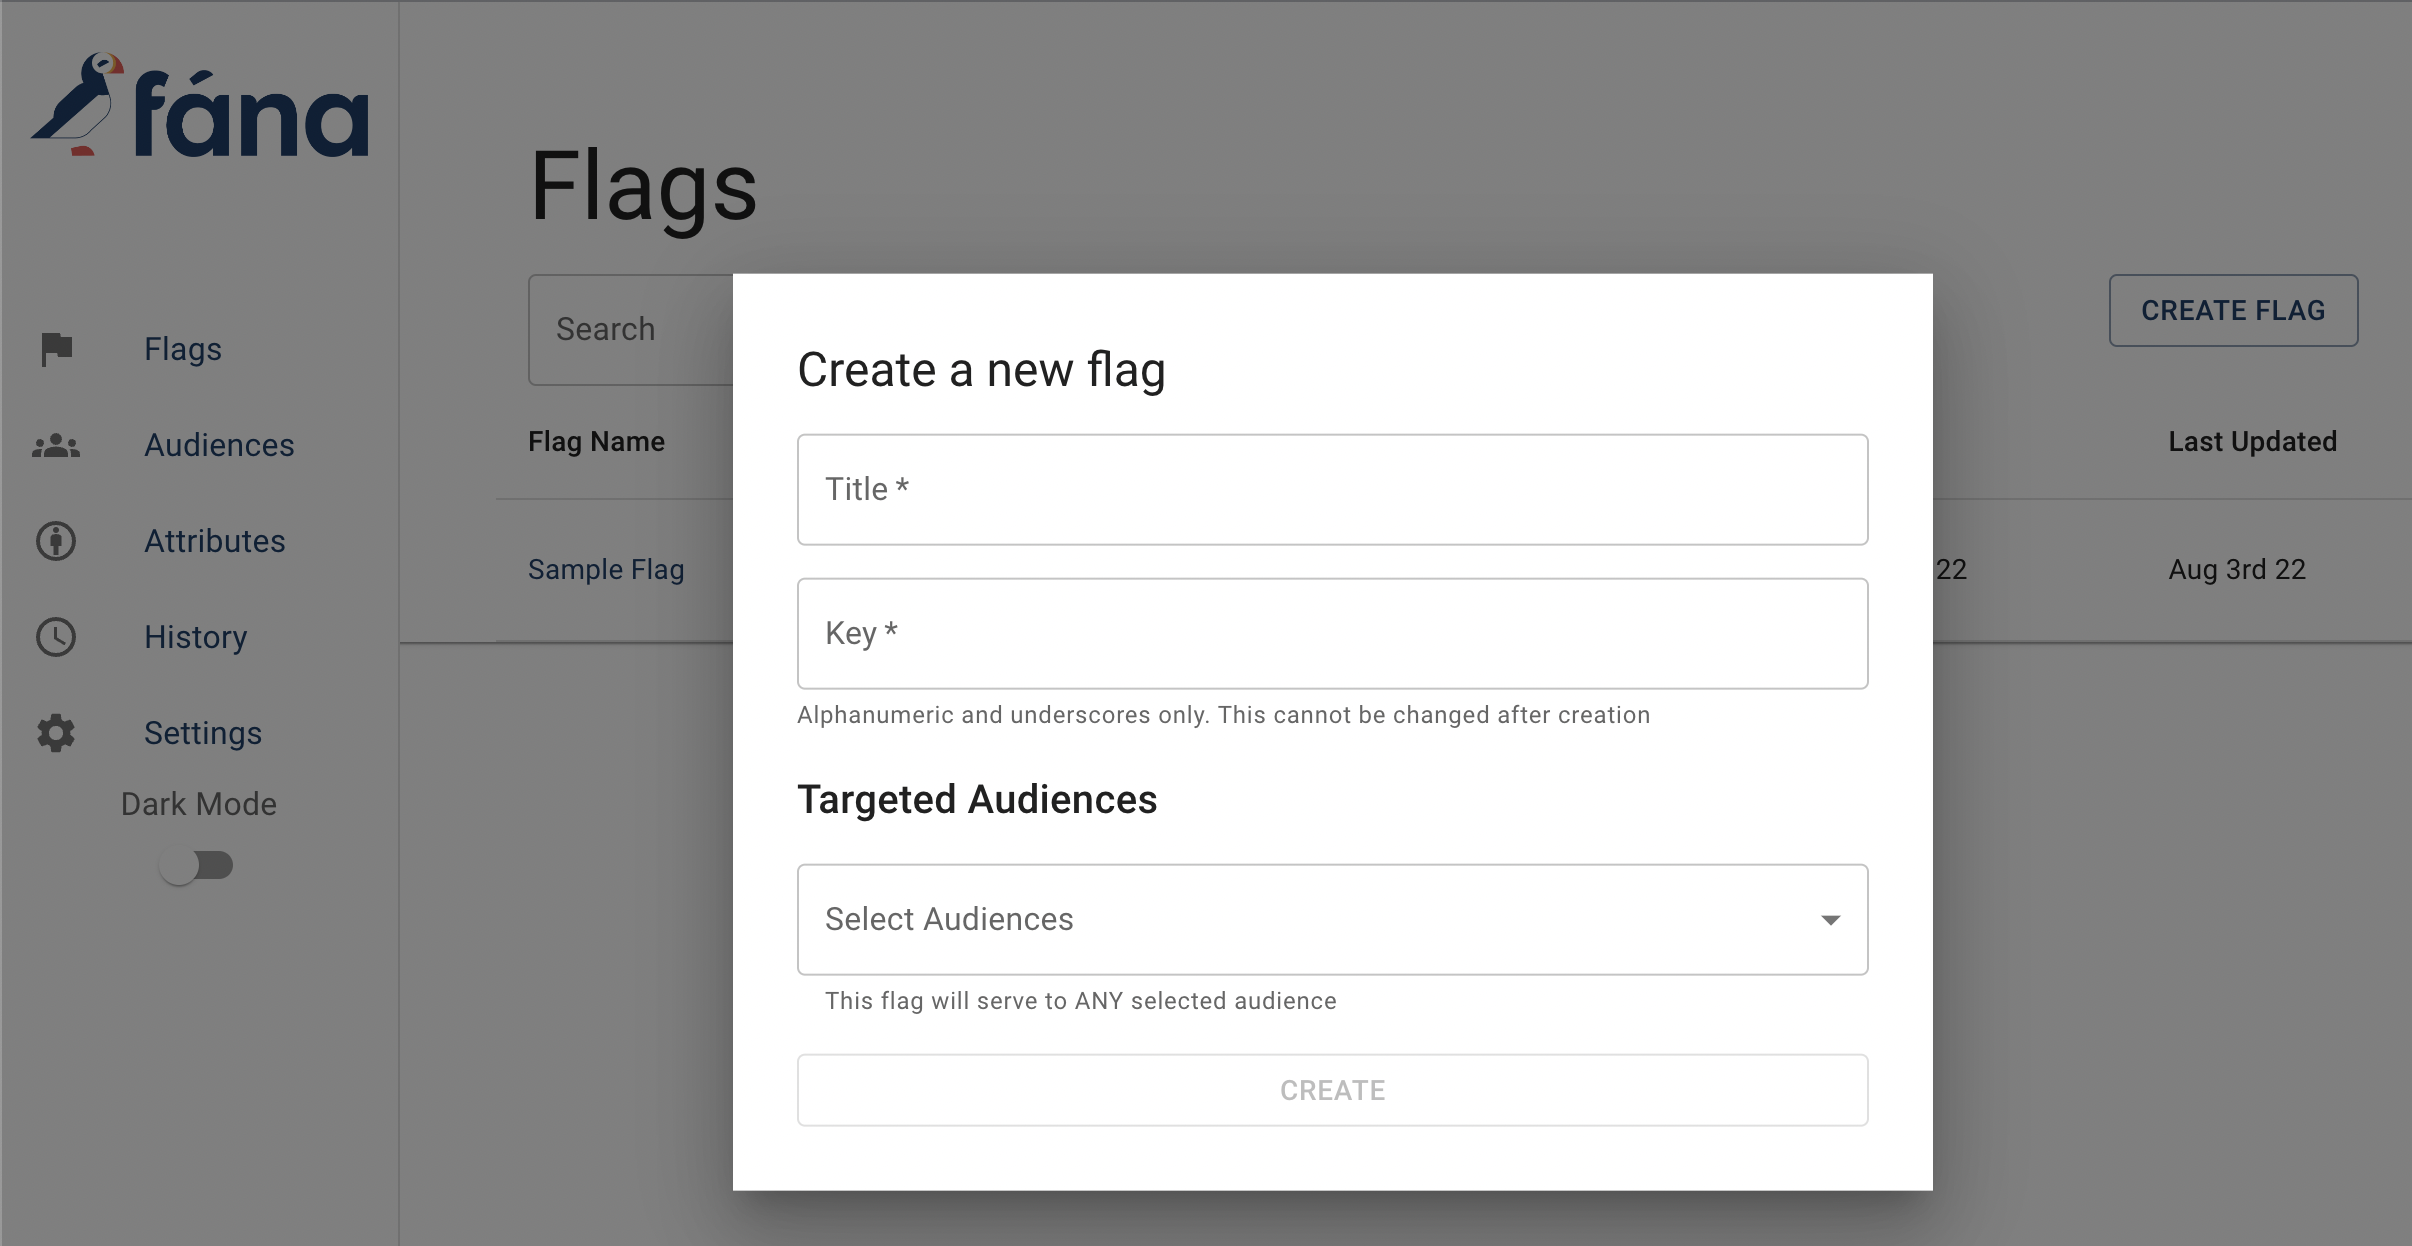
Once you're done filling out all of the fields, you can hit Create to create your flag. The flag will always be disabled upon creation.
Flag Details
Clicking into an flag on the dashboard will bring up the details page. You can see the title, key, status, and targeted audiences. There is also an Add Audience form on the right, and a Delete Flag button in the top right.
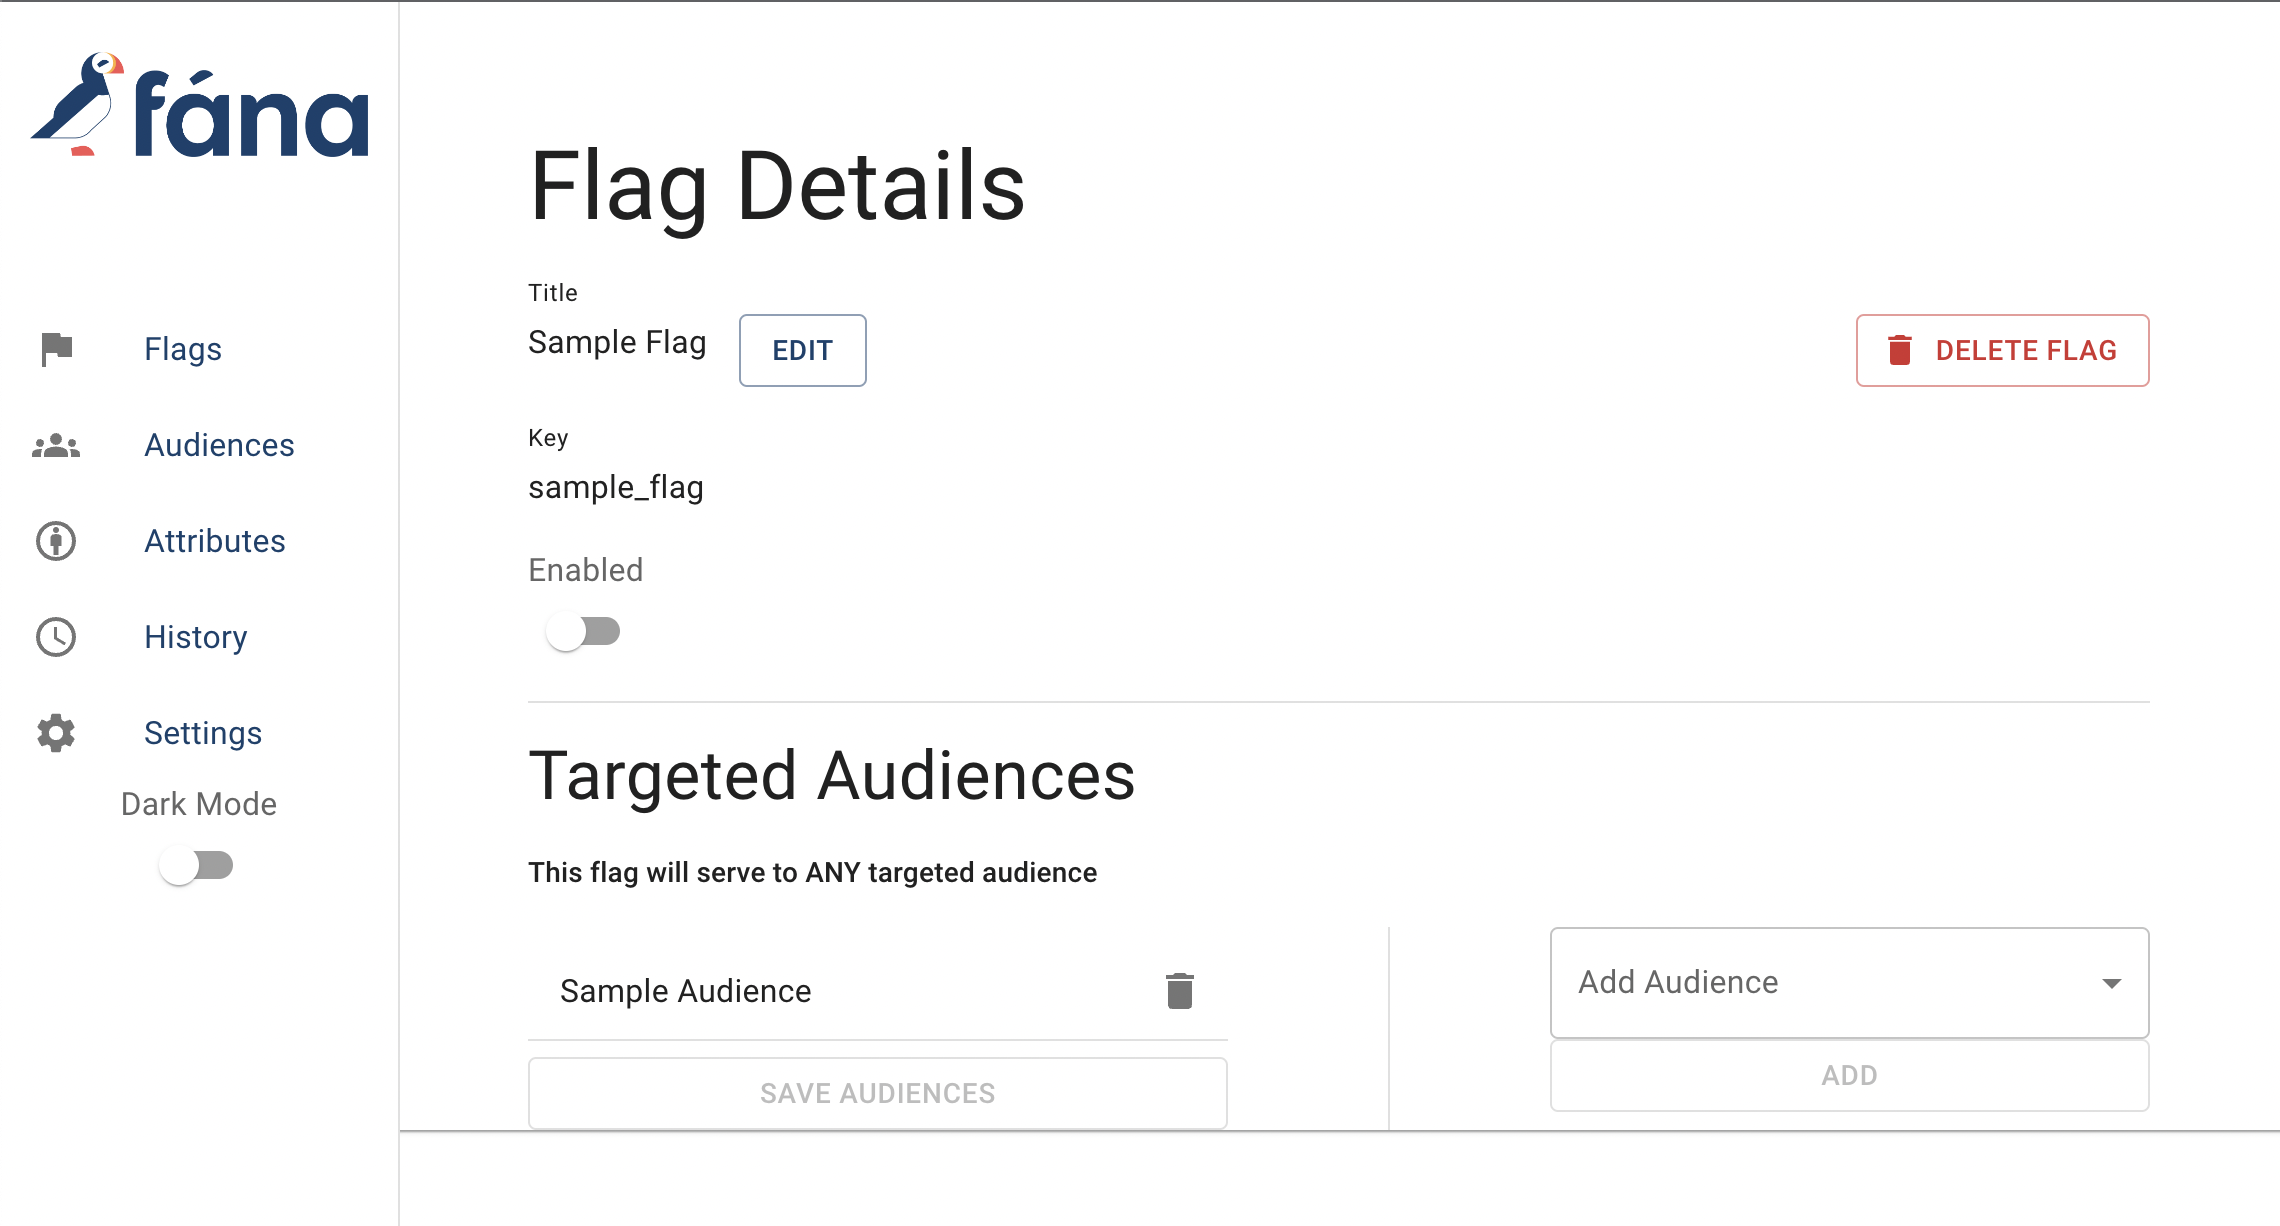
Editing a Flag
You can make a number of changes to your flag after creating it.
You can change the Title by clicking on the EDIT button next to it. Make sure to click SAVE once you're done.
You can also toggle the status on and off by clicking on the toggle switch.
You're also able to edit the targeted audiences. You can remove any currently added audiences by clicking on the trash can on the audience. You can add audiences from the Add Audience field on the right. If you make any changes to these, make sure to click on Save Audiences, or else your changes won't be applied.
Deleting a Flag
You can delete a flag by clicking on the Delete Flag button on the top right of the Flag Details page. A flag can only be deleted if the status is disabled.
Note that deleting a flag means that the flag key will no longer be able to be evaluated on the SDKs. This means that, if still in the application code, the flag will evaluate to whatever default value was set (false if none was specified).