Example Flow
Here's a brief guide on how to create a simple flag with targeted audiences. Let's assume we want to make a flag to only serve our beta test users with a new Beta Header.
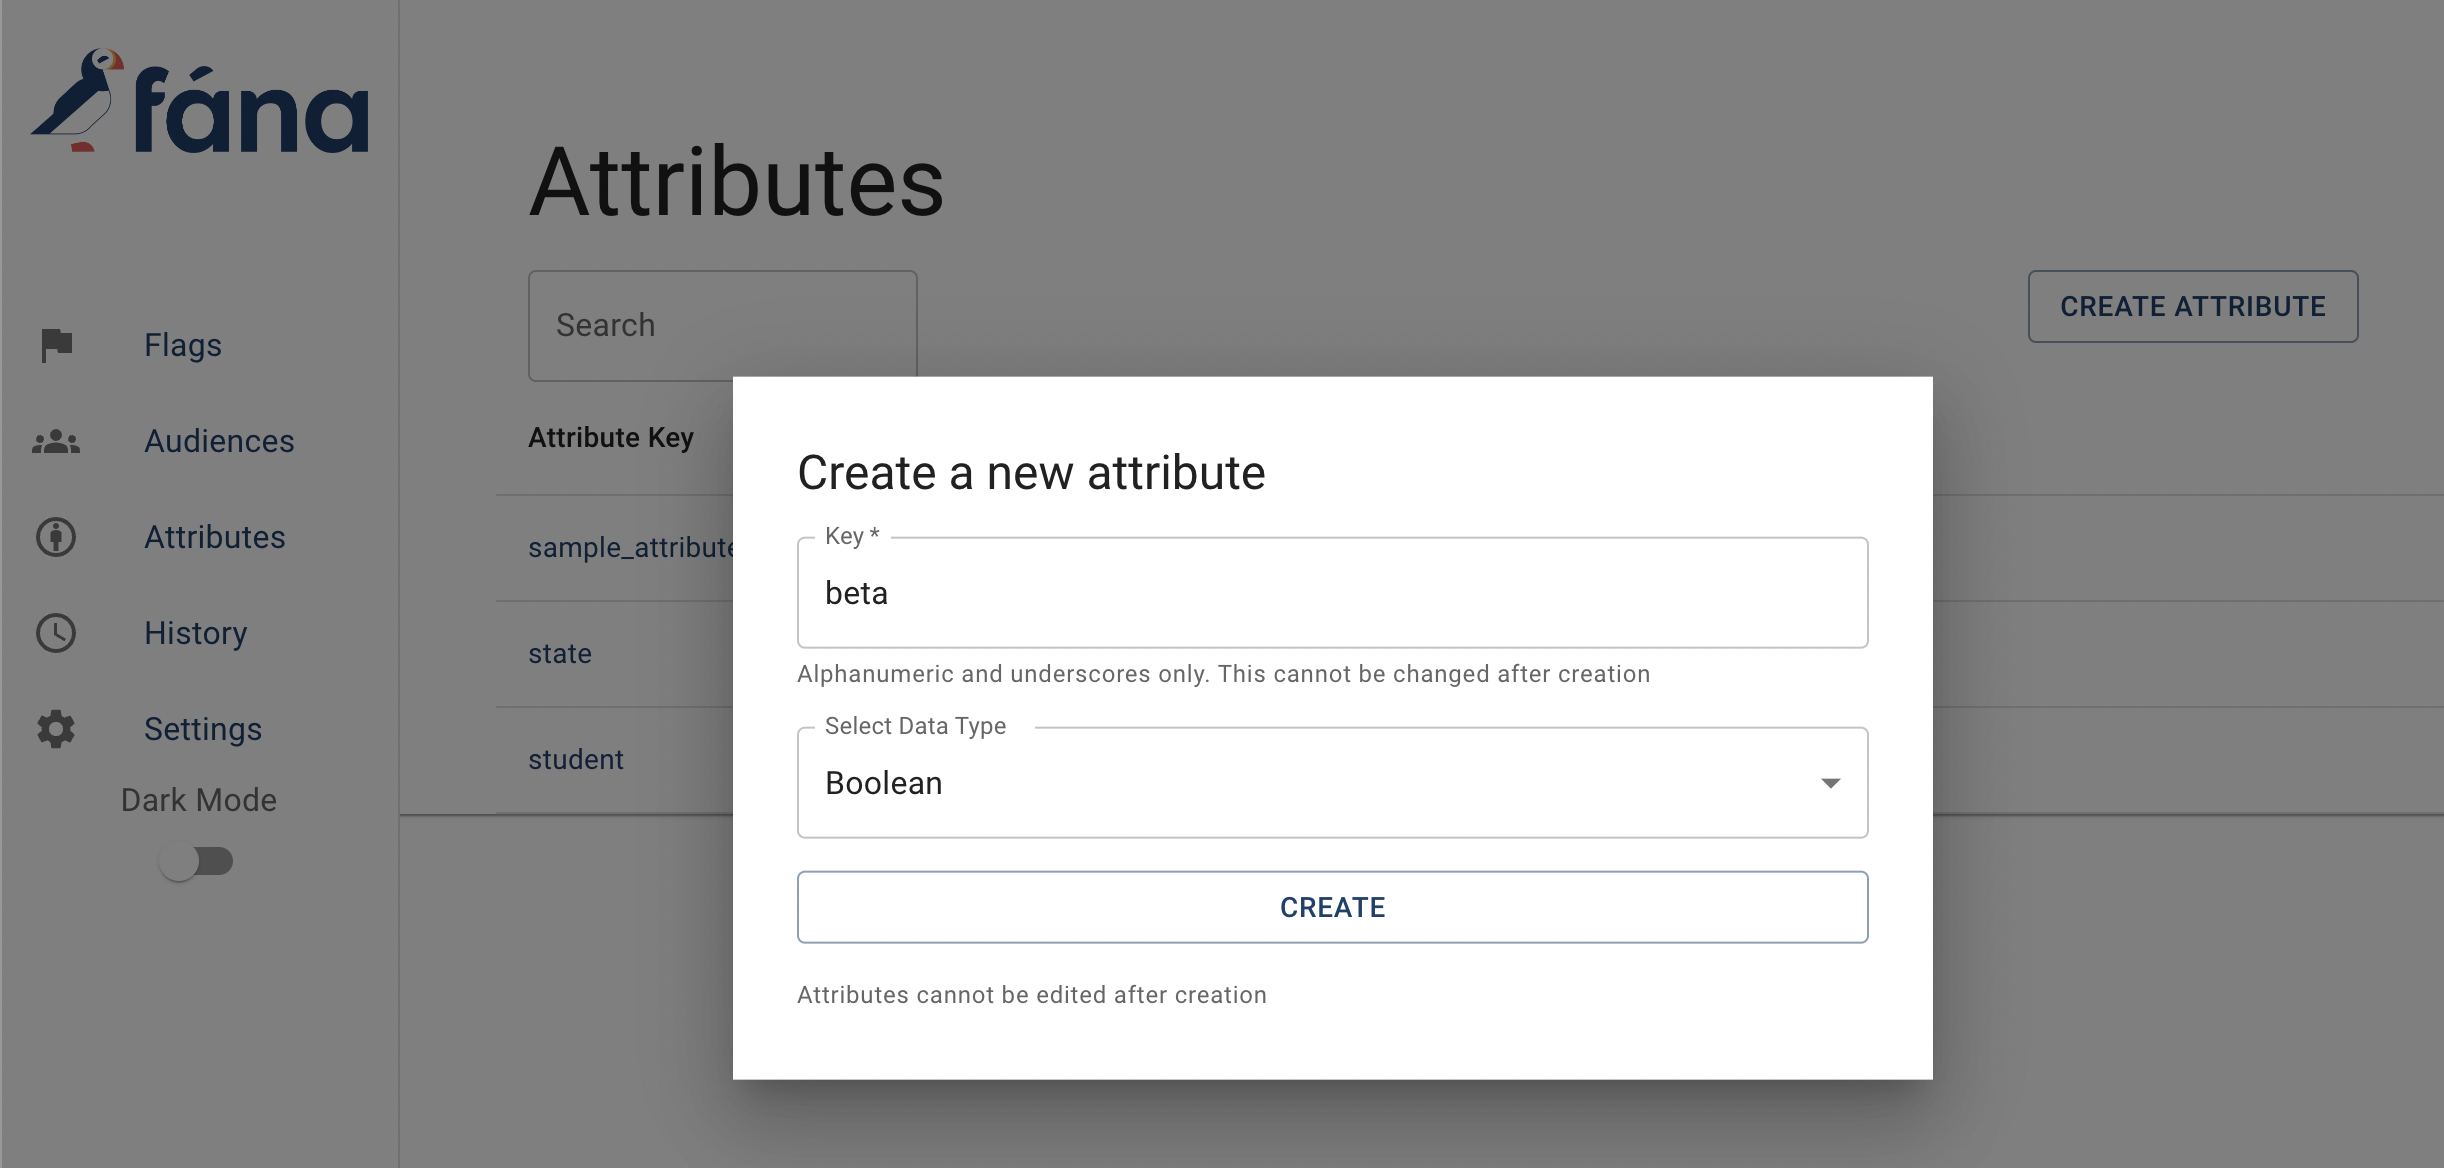
Create the Beta Attribute
In the dashboard, click on the Attributes section in the left navigation bar. Then click on Create Attribute in the top right. We're going to give this attribute the key beta, and it will be a boolean data type. Now we can use this attribute when creating an audience!
Create the Beta Testers Audience
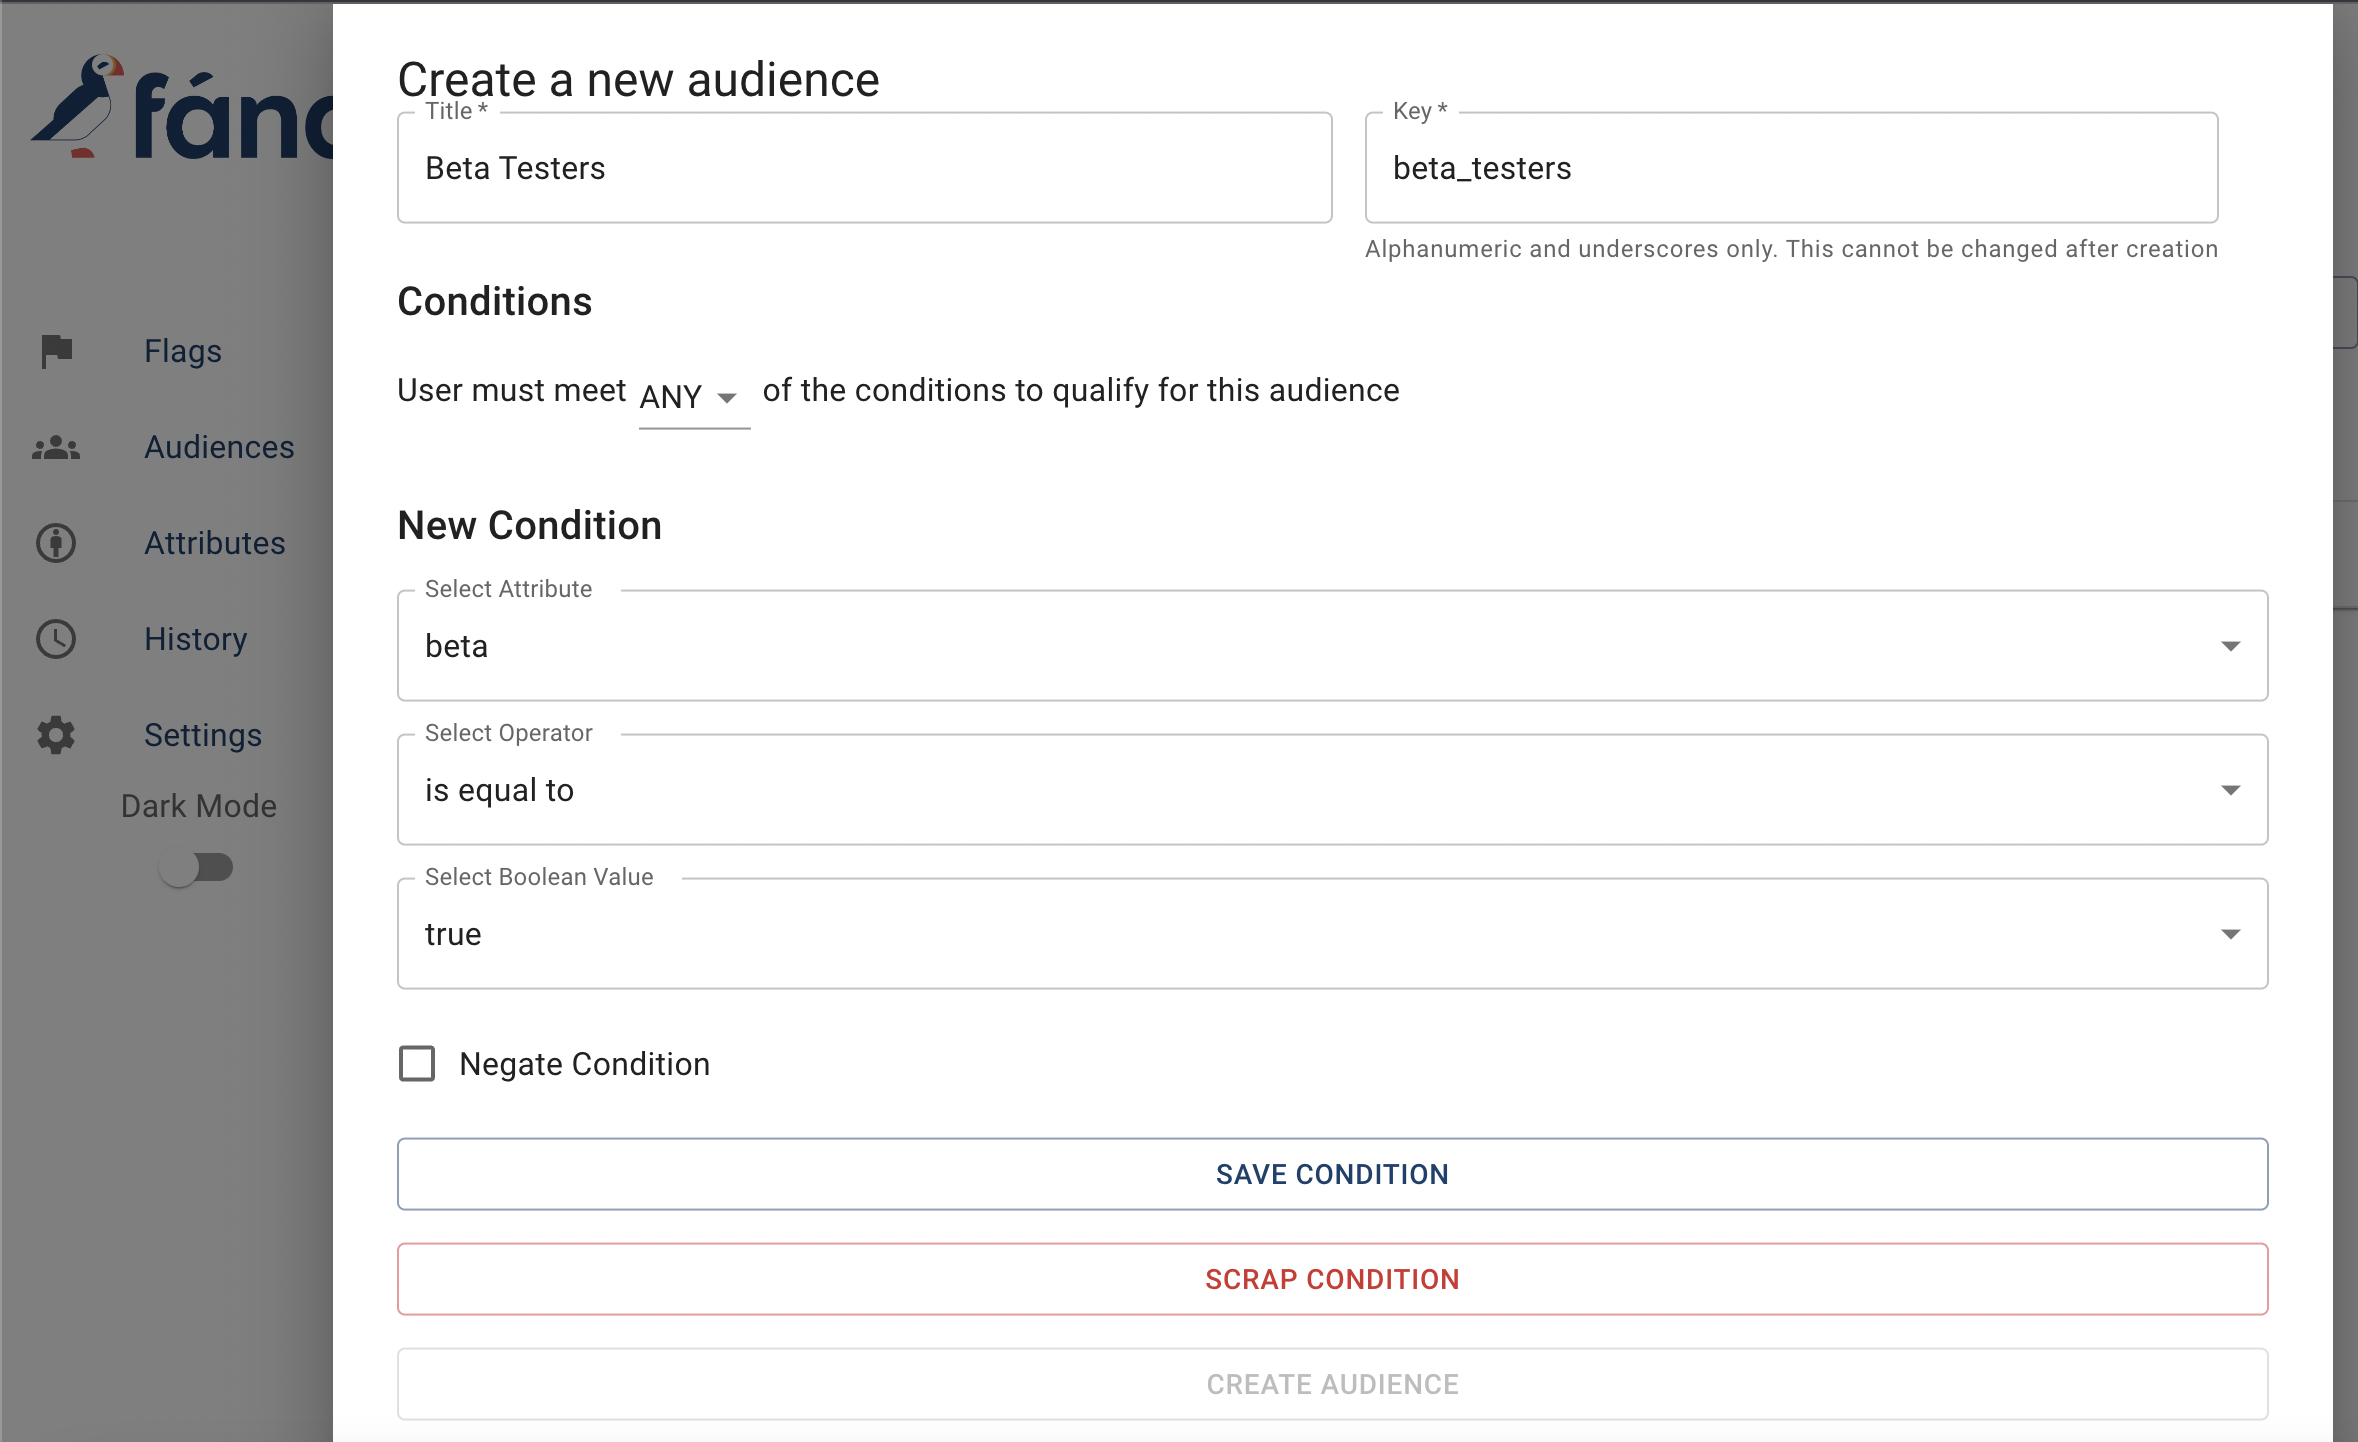
Next, click on the Audiences section in the nav bar. Click on Create Audience in the top right. We're going to name this one "Beta Testers" with the similarly named key, beta_testers.
Then, we need to add the condition. Select your newly created beta attribute, which will bring up two more fields. The operator will be "is equal to" and the boolean value will be true. Then click on Save Condition. Finally, click on Create Audience. Now we can use this audience in our flags!
Create the Beta Header Flag
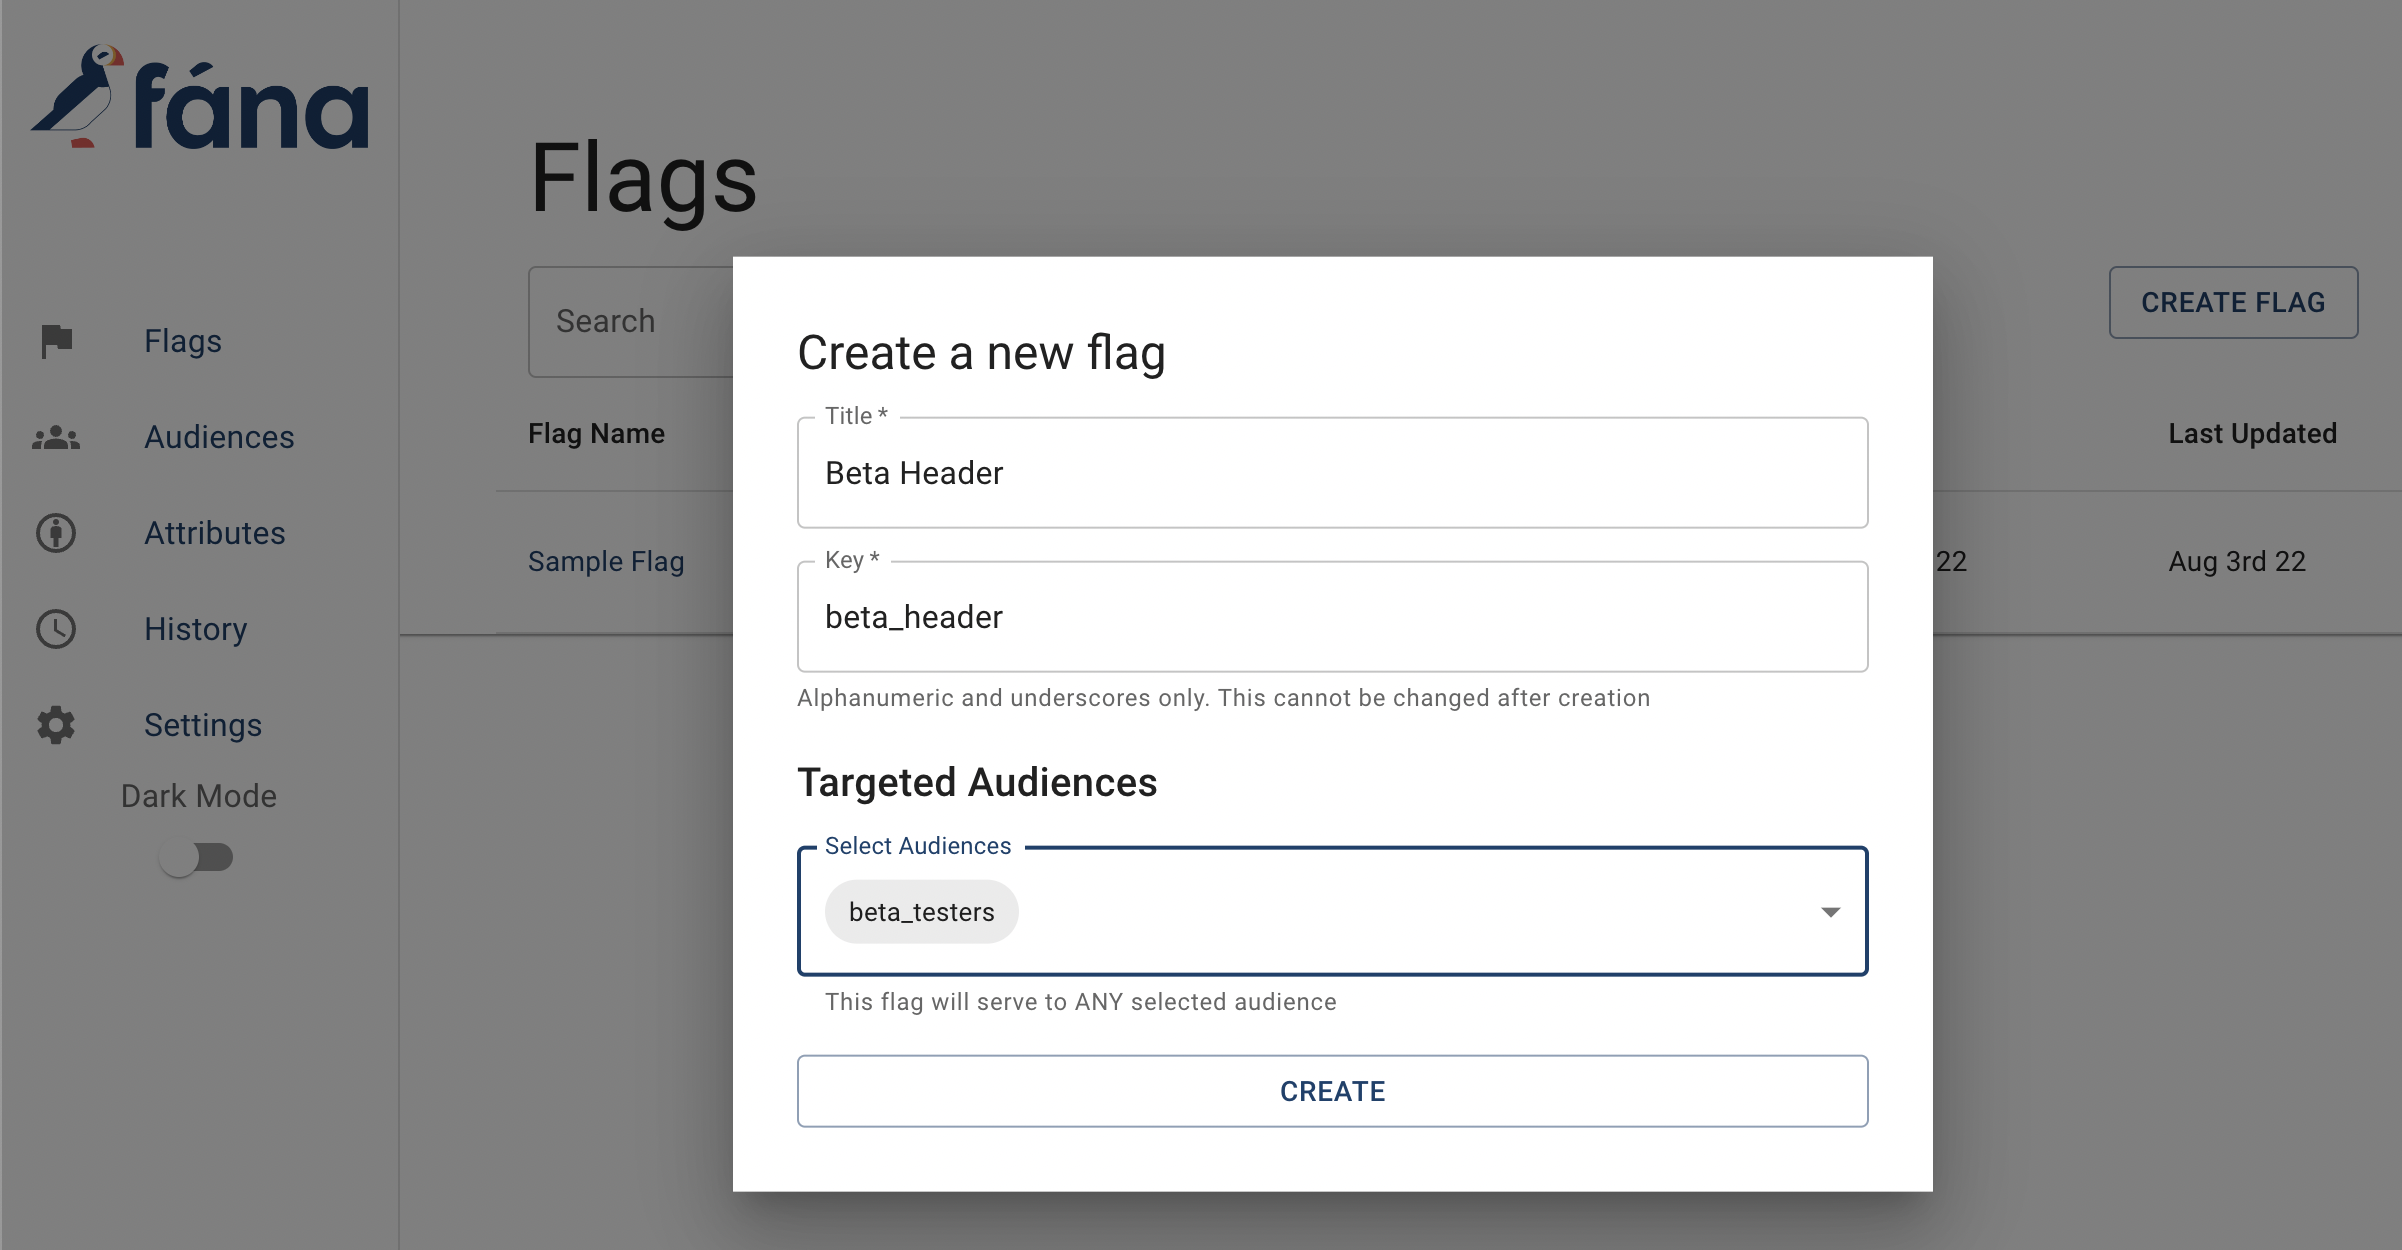
Finally, click on the Flags section in the nav bar. Click on Create Flag in the top right. We're going to name this one "Beta Header" with the similarly named key, beta_header.
Next, let's select our newly created "Beta Testers" audience, and then hit Create.
Our flag is now ready for use! Whenever you're ready to use it, go ahead and click the toggle switch ON either from the flag dashboard or the flag details page for the Beta Header flag.
To see how to use the flag key in your application, see the Using the React SDK page.