Audiences
Audiences represent groups of users that you wish to target. They are made up of conditions, which you can build using the attributes you have created.
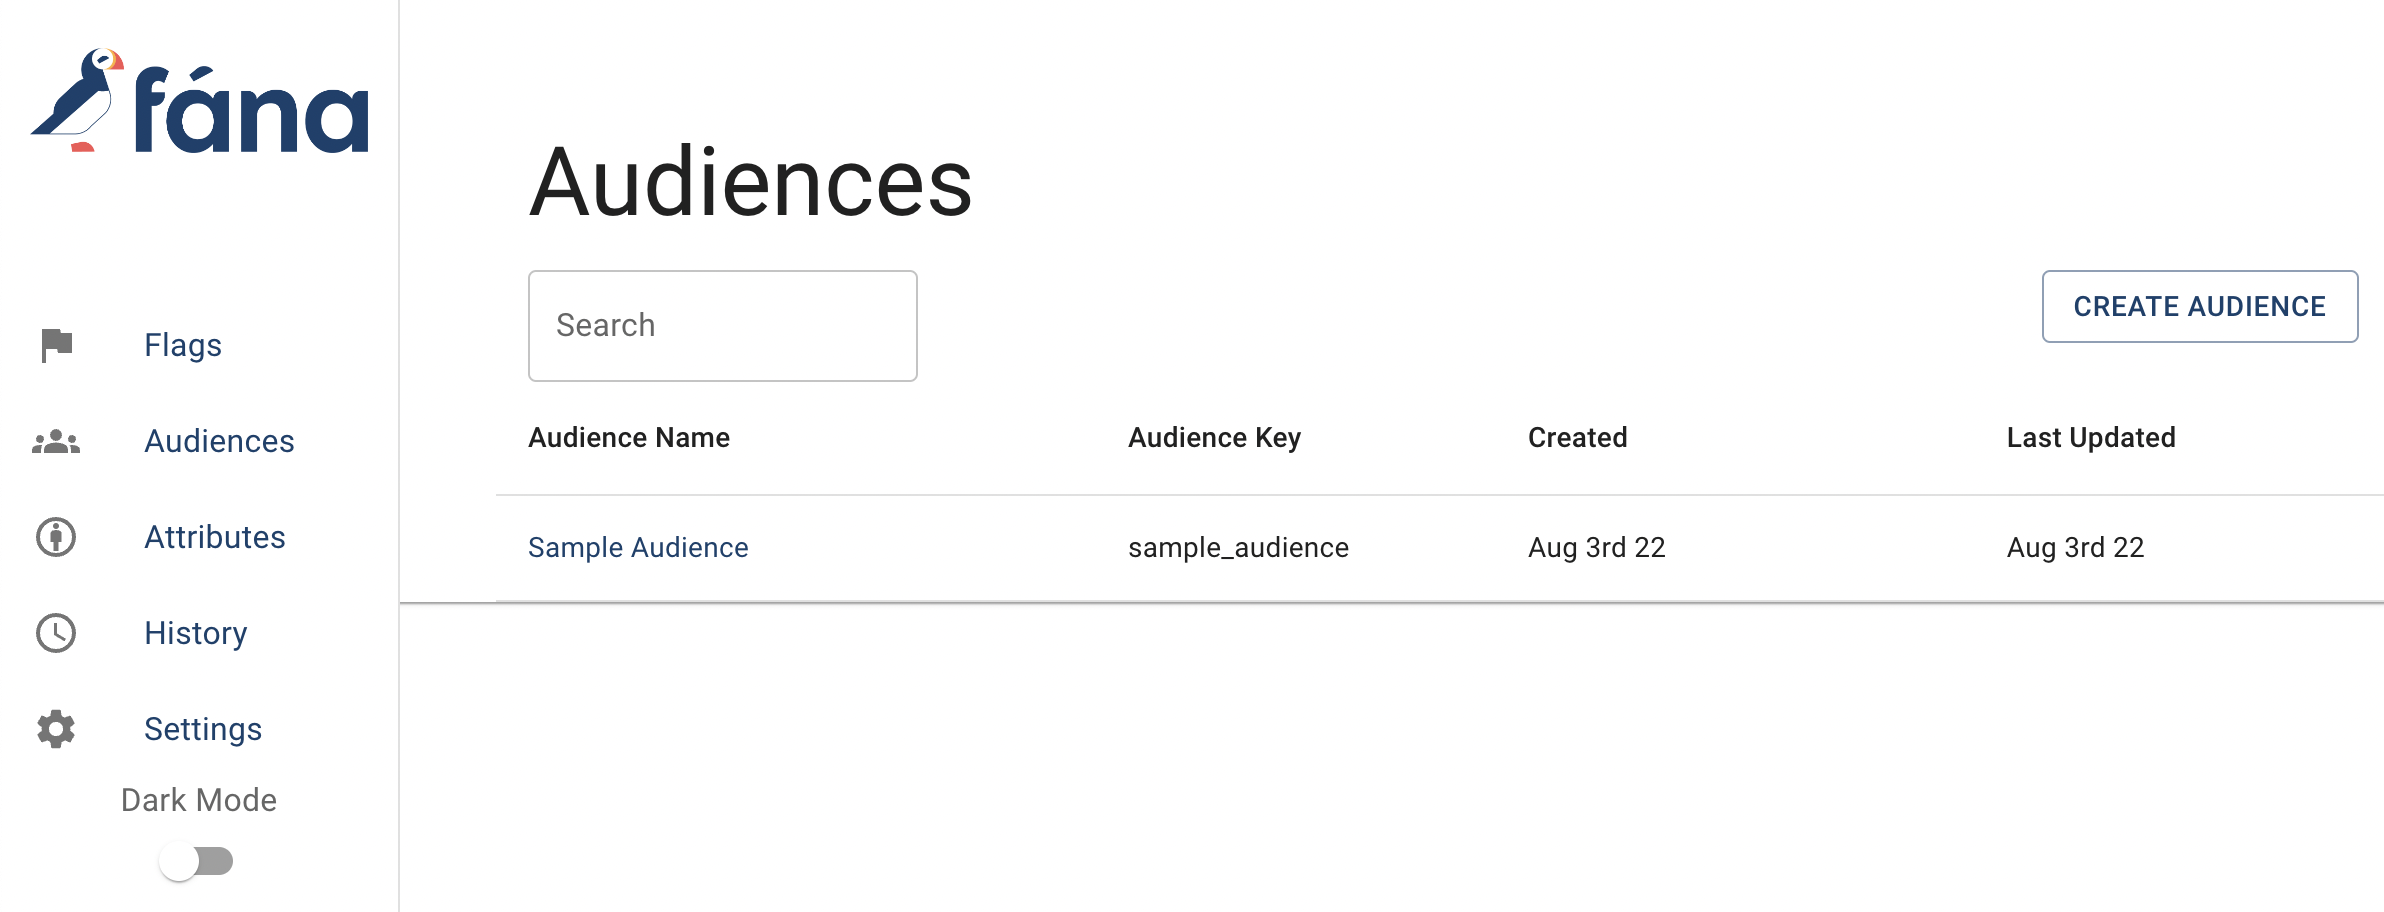
Audience Dashboard
The main view of the Audiences section is a list of all of your audiences. You can see the name, key, when it was created, and when it was last updated. There is also a Search bar where you can filter by both name and key.
Creating an Audience
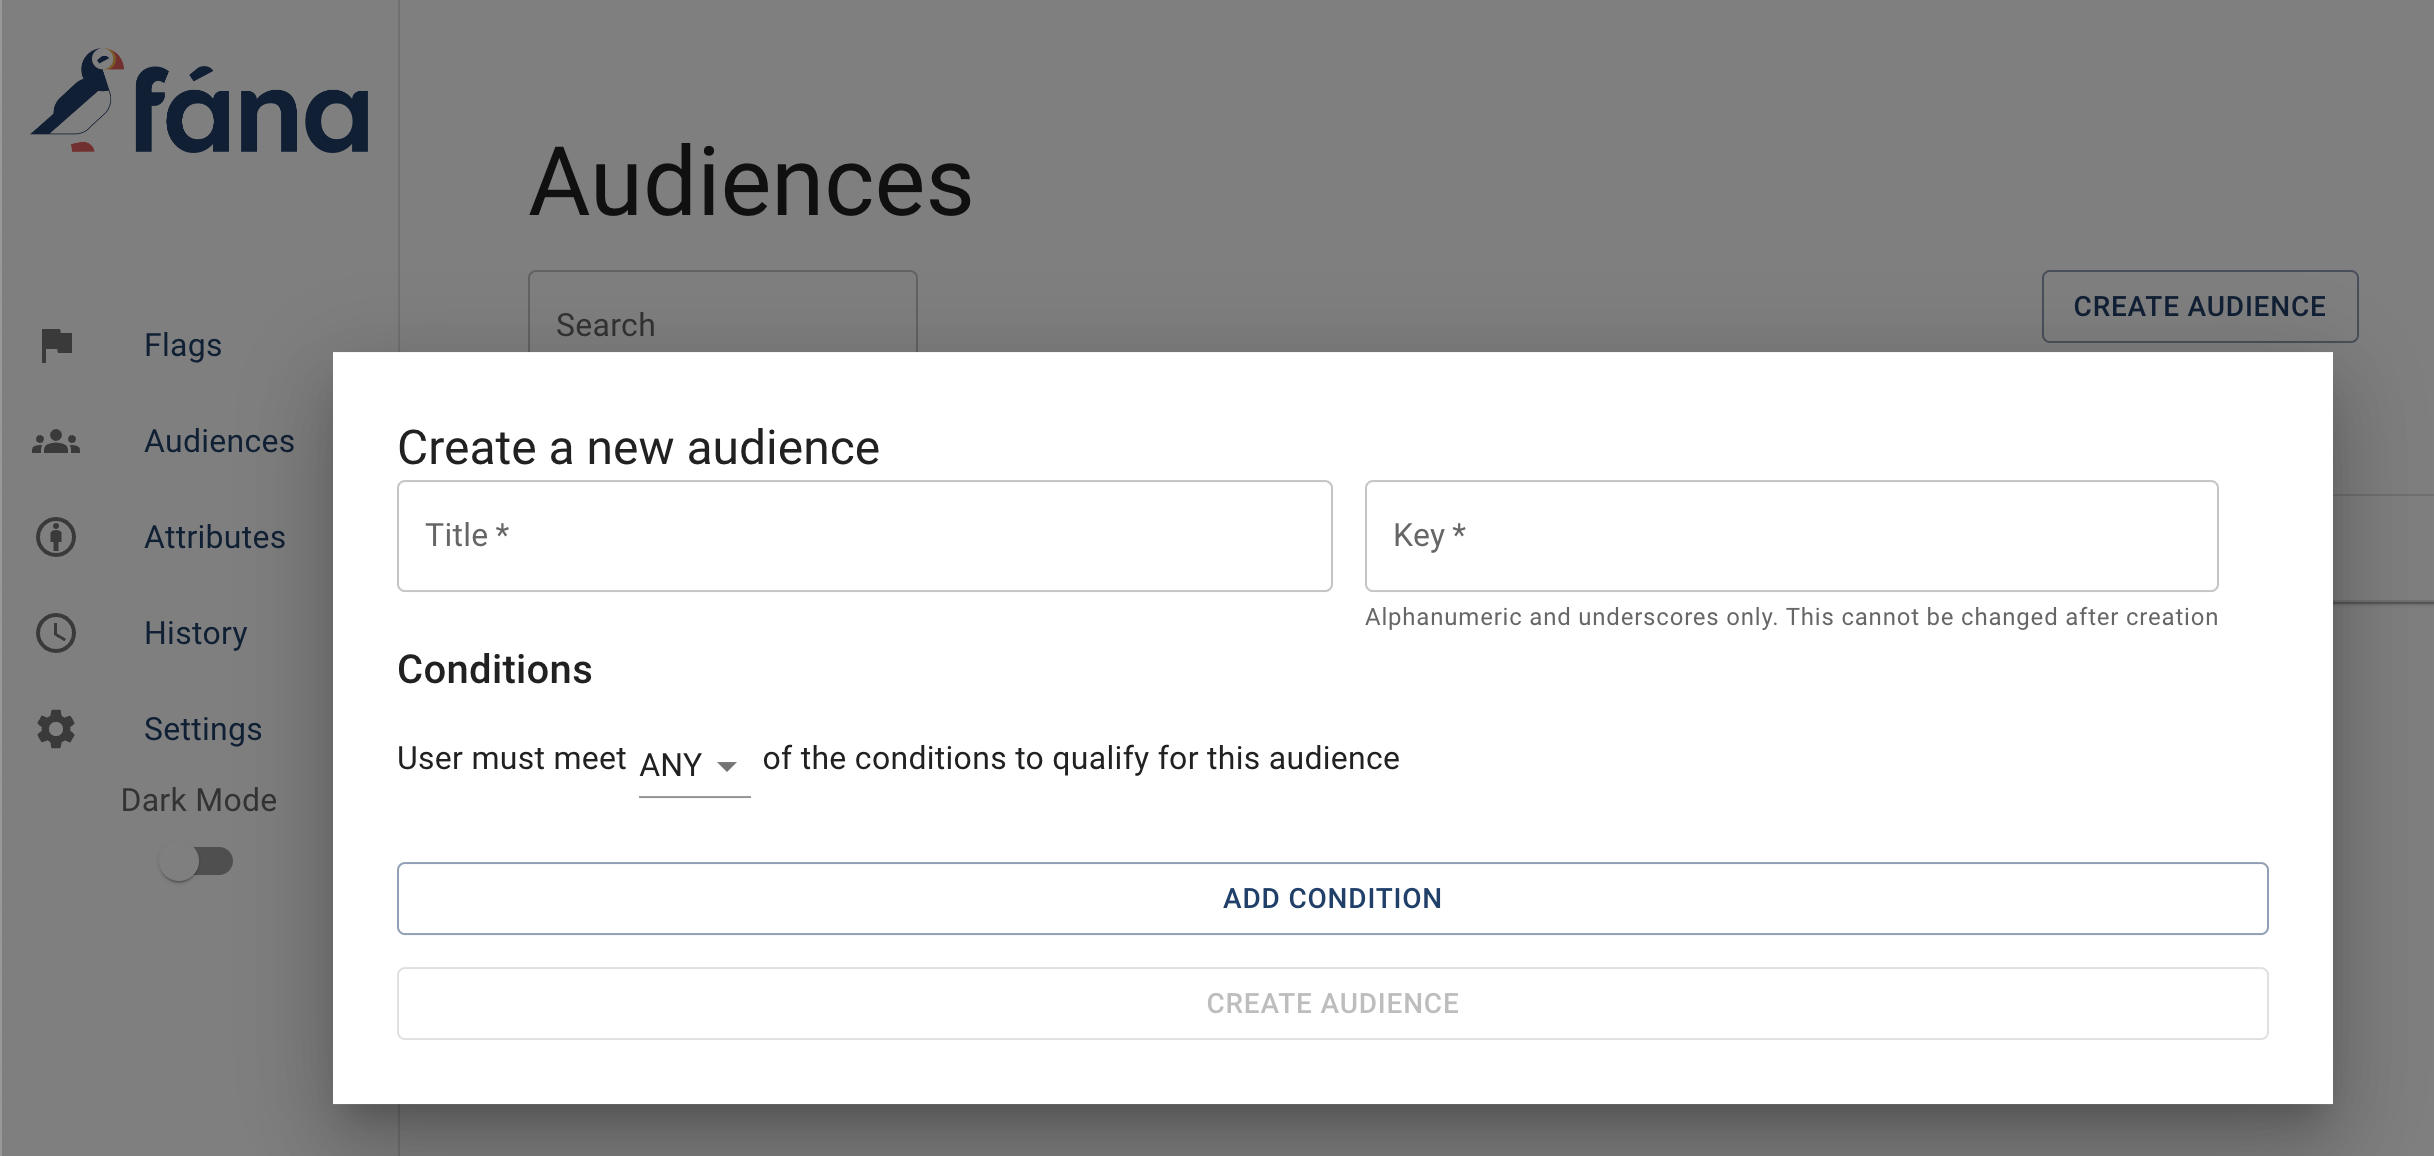
To create an audience, click on the Create Audience button on the top right of the Audience Dashboard. Clicking on it will reveal a modal. Here are the fields:
- A title/name. This is simply a display name meant to help you easily identify your created audiences.
- A key. This can be anything you want, though it should be somewhat similar to your title/name. For example, if your title is "Beta Testers", your key can be "beta_testers".
- Note that the key must be made up of alphanumeric/underscore characters only. It also cannot be changed after creation.
- ANY/ALL. Also known as the combination.
- ANY means that the user only needs to meet one of the conditions to be considered part of this audience.
- ALL means that the user must meet all conditions to be considered part of this audience.
- Conditions. This is optional and you can adjust it later if needed. See below for more information on building conditions.
Once you're done filling out all of the fields, you can hit Create Audience to create your audience.
Building Conditions
If you don't have any attributes, you will not be able to build a condition. Refer to the Attributes page for information on creating attributes.
In the Create a new audience form, you will see a button to Add Condition. This will bring up a New Condition form that prompts you to select one of your attributes. After doing so, two more fields will show up: Operator and Condition Value.
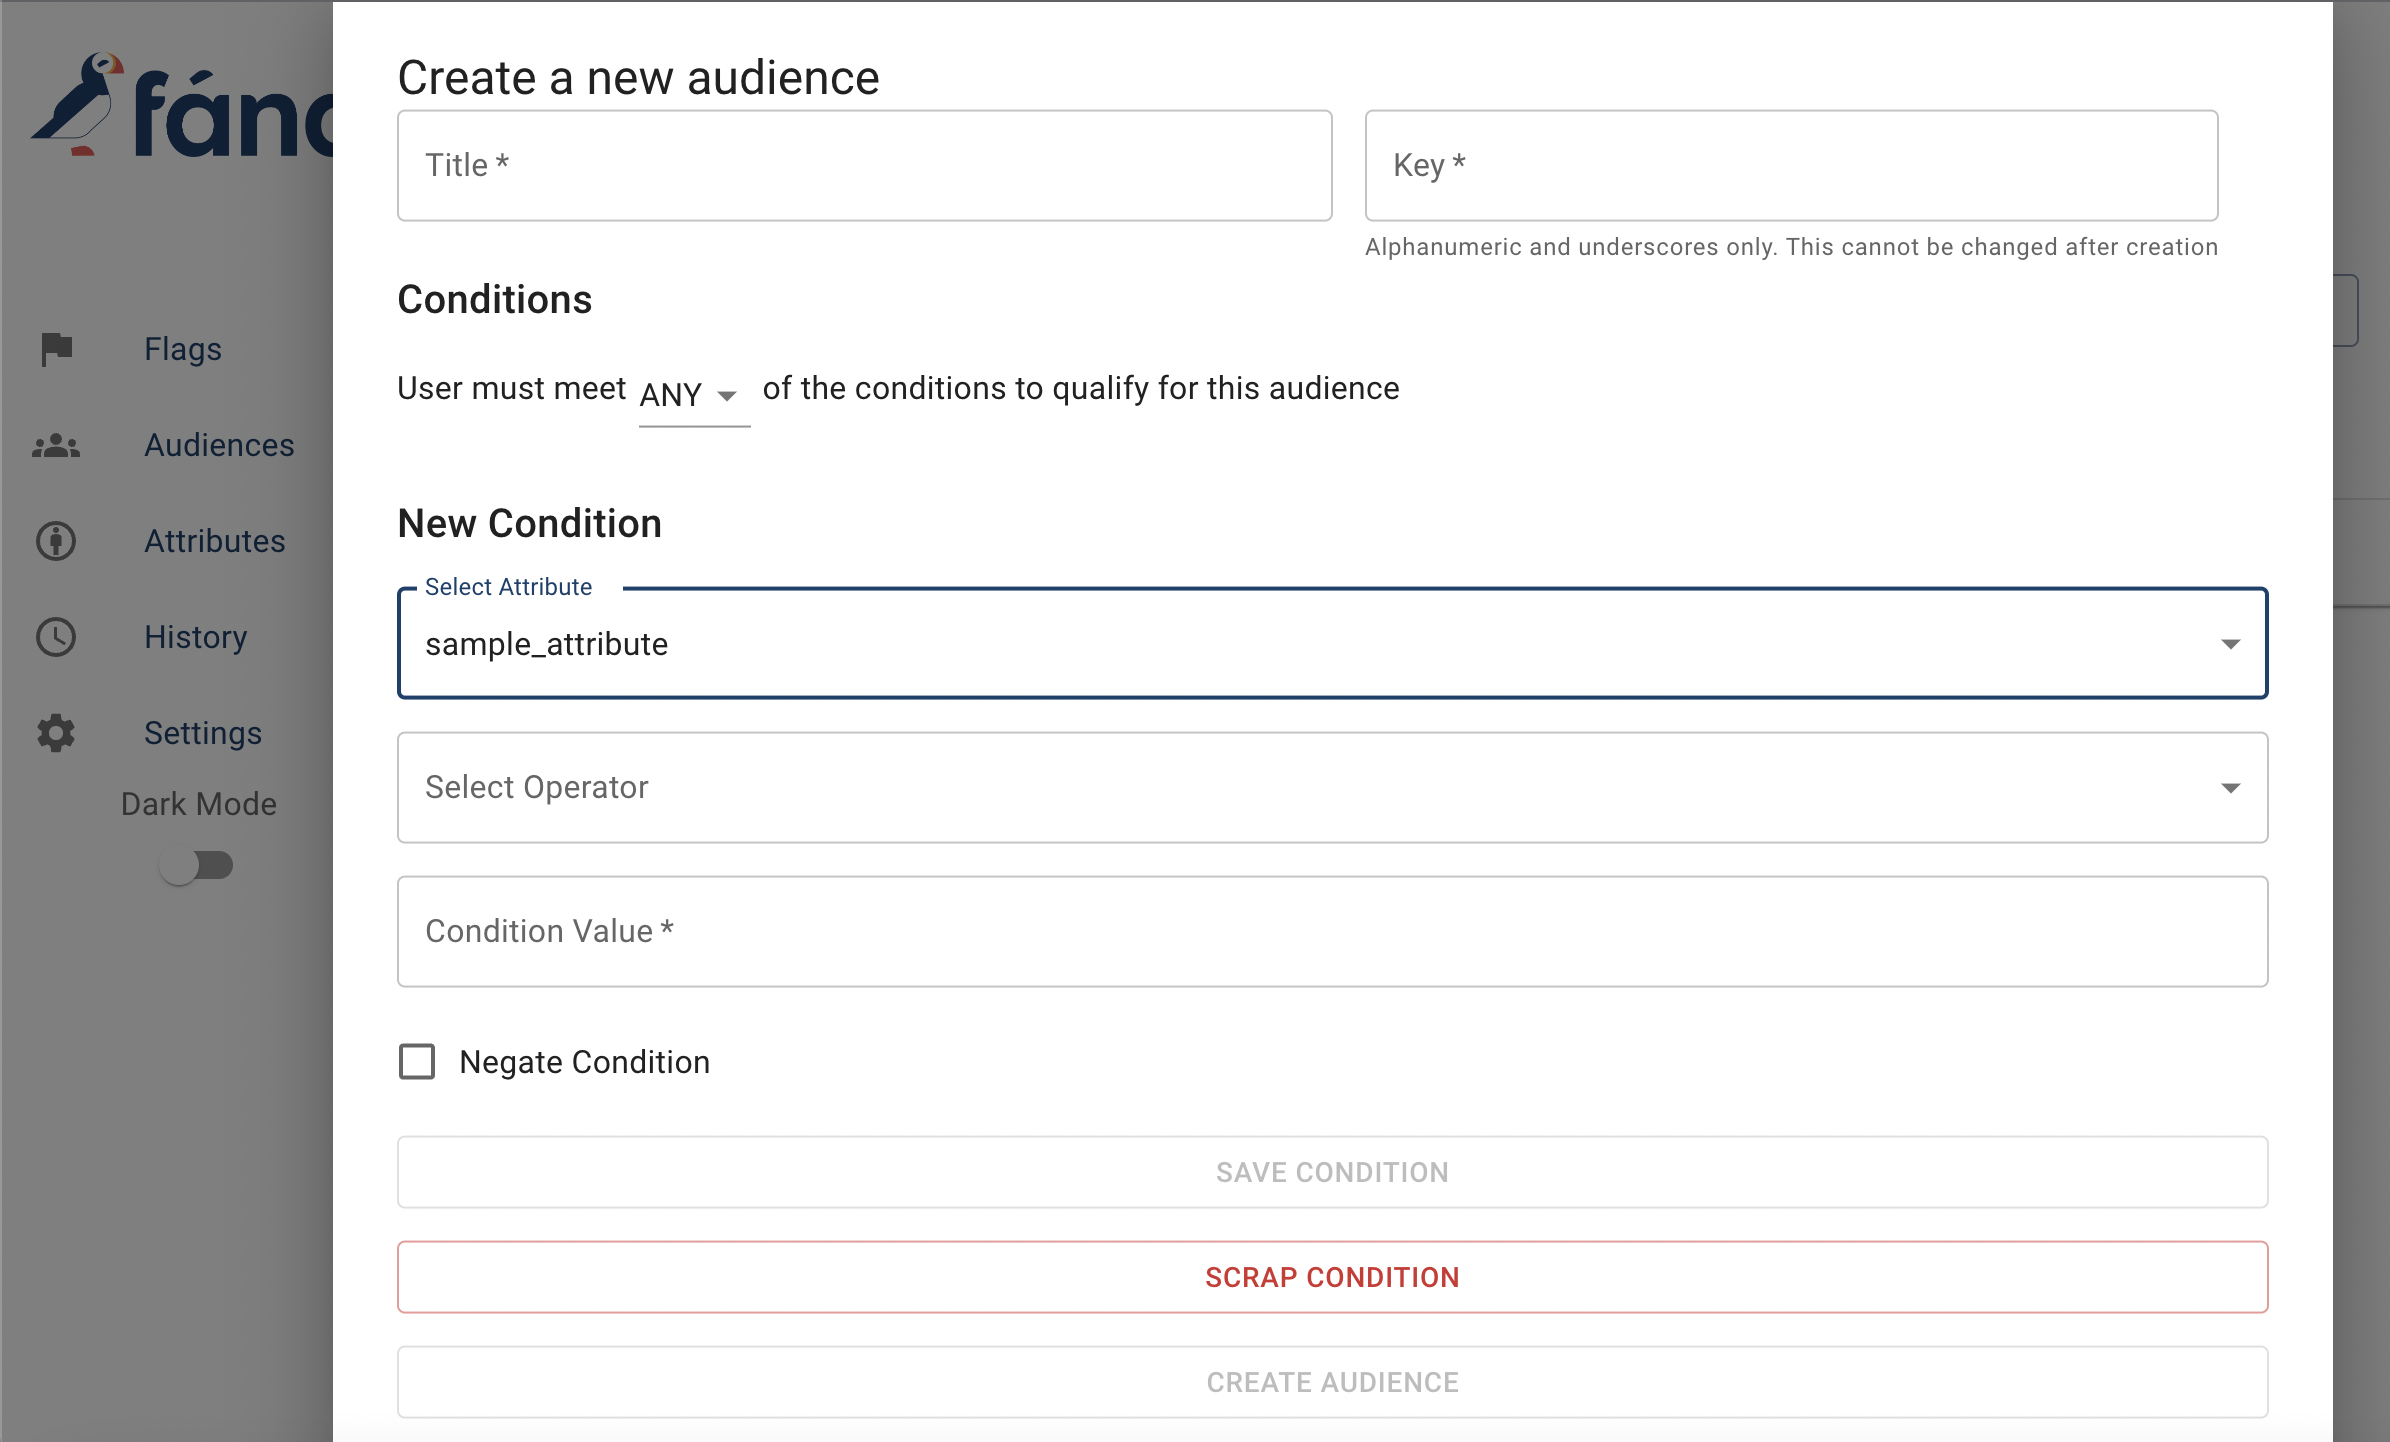
The Operator represents the relationship between the attribute and value. The options will depend on what the attribute's data type is. For example, if the attribute is a string, you can select from "is equal to", "is in", "contains", etc.
The Condition Value is the actual value that you want to compare against the attribute. If your attribute is a string data type, you can input pretty much anything in this field. If the attribute is a boolean, you're limited to true and false. And if it's a number, you can only input numbers and a decimal.
Lastly, there is a checkbox to Negate Condition if you so choose. This means that whatever the evaluation ends up being will be the opposite. Note that Negate Condition does not apply if the attribute is not present in the user context.
If at any point you decide you don't need the condition you're working on, you can click on Scrap Condition to remove it. You can also remove completed conditions by clicking on the trash can icon on the condition itself.
Here are some examples of conditions and how they would evaluate:
beta is equal to true: Any user context with thebetaattribute set totruewill evaluate totruefor this condition.- If the user context has
betaset tofalse, or if thebetaattribute is missing altogether, they will evalute tofalse.
- If the user context has
state is in CA,TX,FL: Any user context with thestateattribute set to eitherCA,TX, orFLwill evaluate totruefor this condition.age NOT = 21: Any user context with theageattribute set to21will evaluate tofalsefor this condition. Note thatNOTcomes from the Negate Condition checkbox.- If the user context has the
ageattribute to any value besides21, it will evaluate totruefor this condition. - If the user context does not have the
ageattribute, it will evaluate tofalsesince this condition does not apply.
- If the user context has the
Audience Details
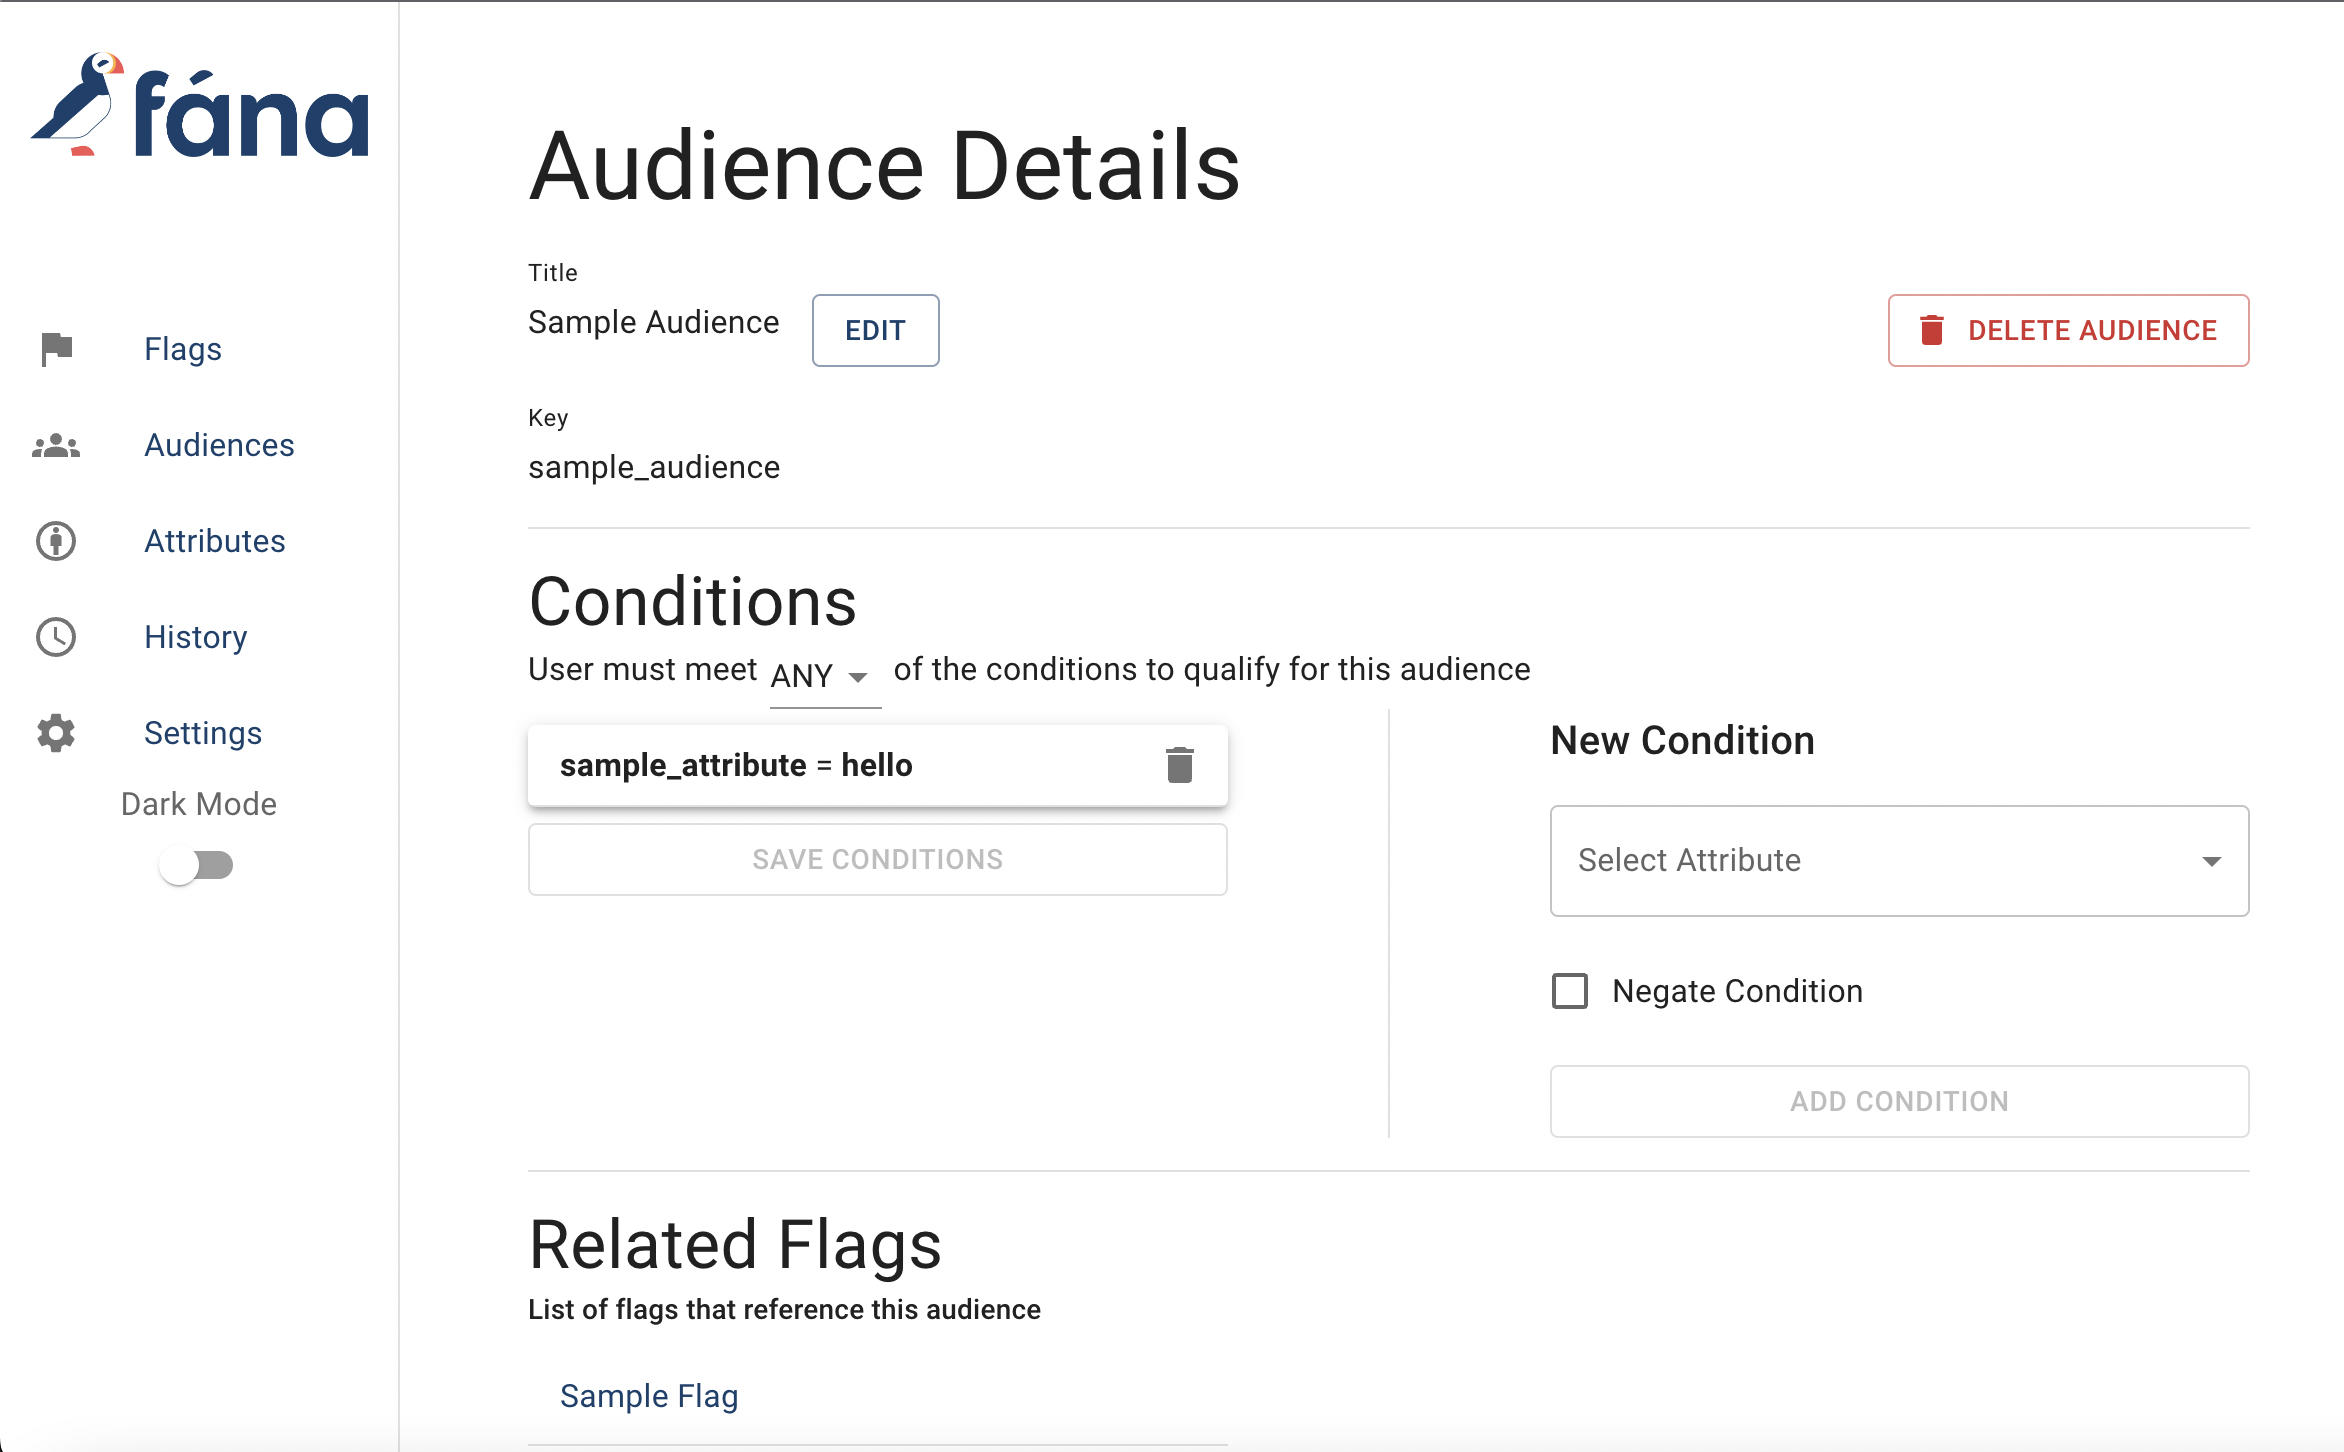
Clicking into an audience on the dashboard will bring up the details page. You can see the title, key, conditions, as well as Related Flags - a list of all of the flags this audience is being used in. There is also a New Condition form on the right, and a Delete Audience button in the top right.
Editing an Audience
You can make a number of changes to your audience after creating it.
You can change the Title by clicking on the EDIT button next to it. Make sure to click SAVE once you're done.
You can change the combination (ANY/ALL) right below the Conditions header. You can also remove any conditions that were previously added by clicking on the trash can icon on the condition. Lastly, you can add new conditions by using the New Condition form on the right side. It works similarly to the one in the Create a new audience form. If you make any changes to these, make sure to click on Save Conditions, or else your changes won't be applied.
Deleting an Audience
You can delete an audience by clicking on the Delete Audience button on the top right of the Audience Details page.
You may only delete an audience if it's not in use by any flags. If it is in use, it will inform you as such. You can reference the Related Flags section to see which flags are using the audience.